- L.A.D.A & M.S.P.S.G routines on junctions and crossroads you approach
- Nearside to near side and offside to off side then crossing
- Two second gap. hold back position
- Meeting, overtaking, adequate clearance when overtaking stationary & slow moving vehicles
- Awareness and planning
- Traffic calming measures
- Hill/angle starts
- Busier junctions
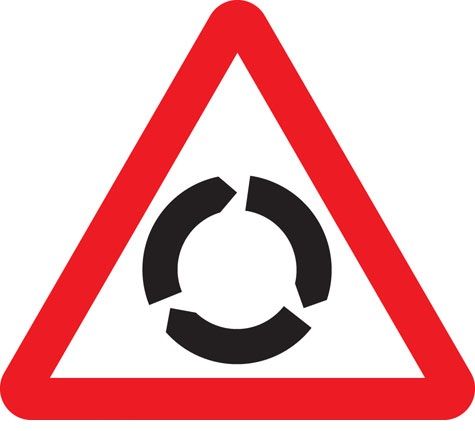
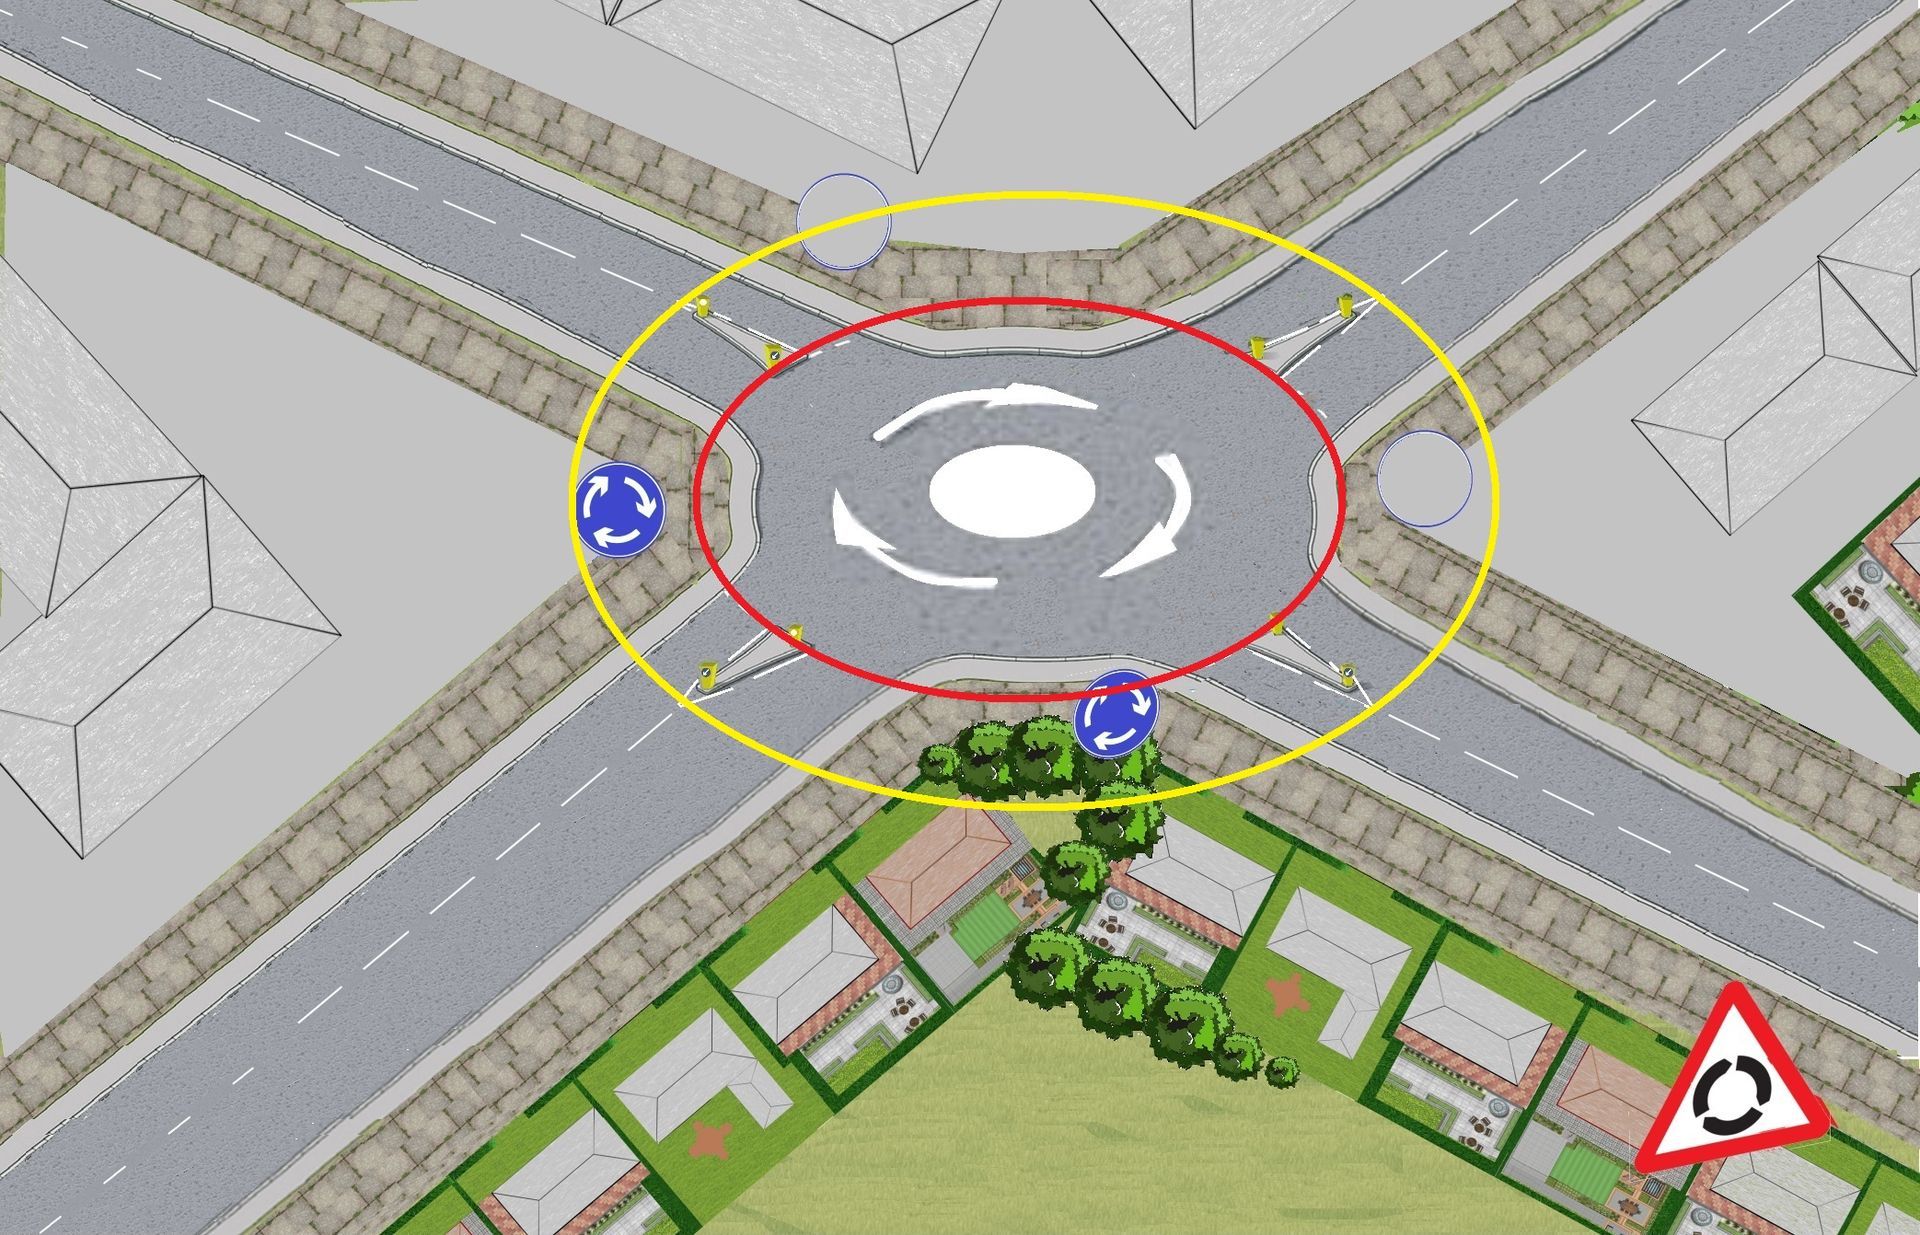
- Approaching and negotiating single and multi lane roundabouts
- Fault
- Implication
- Solution
- Help
- Full talk through
- Prompt
- Independent
Subject brief
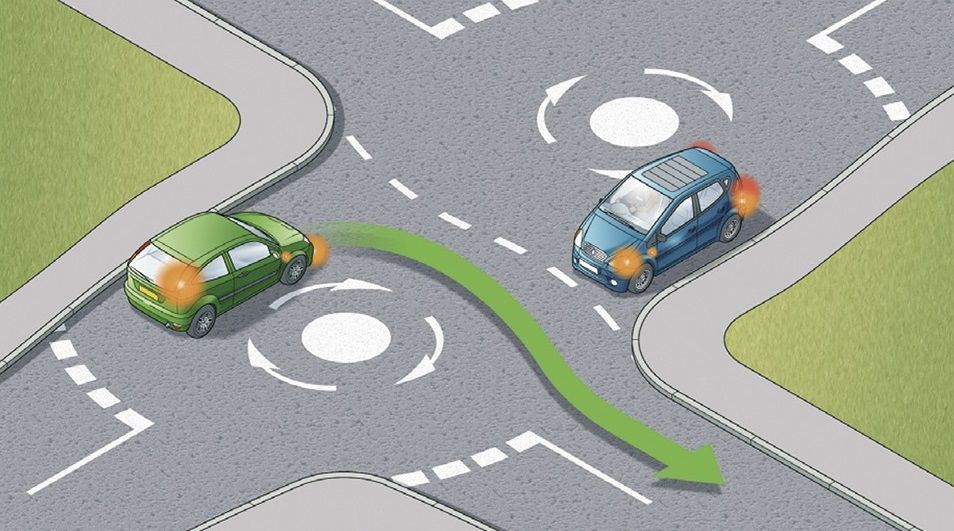
Roundabouts are designed to keep the traffic flowing in a clockwise direction. Always give-way to traffic already on the roundabout approaching from your immediate right.
Approaching a Mini roundabout using L.A.D.A
Apply early observations as early as possible (L.A.D.A).
Start your hazard routine as you roughly at the round sign (10/12 car lengths from the roundabout).
Roundabouts can be open or closed (so L.A.D.A early so you can assess the flow of traffic on the roundabout as your approach).
Use of the M.S.M routine (hazard routine)
On approaching to all roundabouts take notice and act on all the information available to you, including traffic signs, traffic lights and lane markings which direct you into the correct lane. You should follow the highway code rule 184.
Start the hazard routine, 12/10 car lengths away from the roundabout (roughly the roundabout triangle sign).
- Mirrors interior mirror and left door
- Mirrors interior mirror and left door
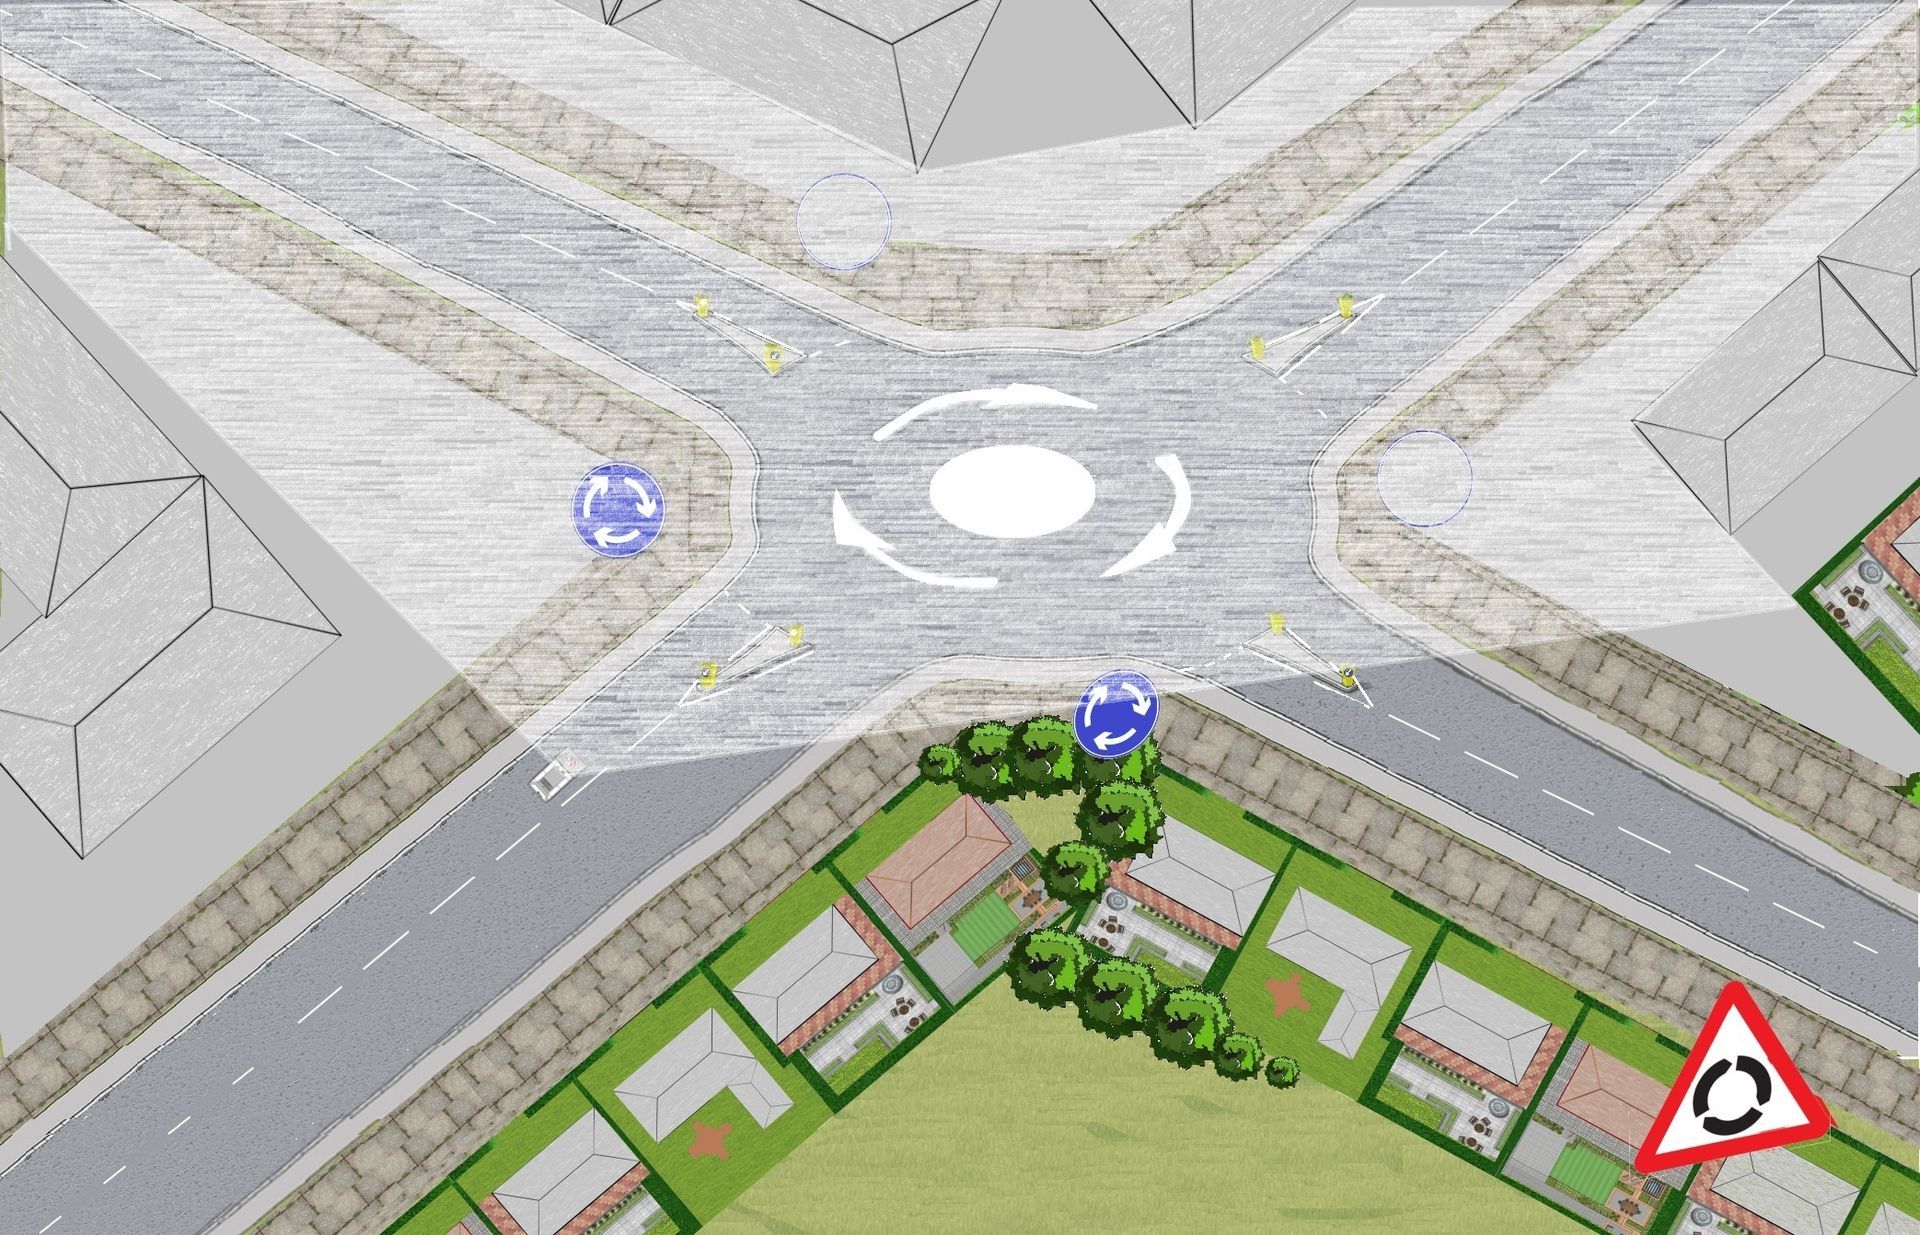
Open/closed view
Mini Roundabouts just like any roundabouts can ether be open and closed.
Drivers approaching from the open view sides unfortunately approach a lot faster than the closed side, due to what they can see ahead and on their immediate right. If your view is closed right until you get to the give-way line, slow down (stopping if necessary) go into 1st gear, this strategy will prepare you to go once you are at the give way line. Your confidence will improve in time and eventually you will master slowing and flowing.
Open view on the approach to a mini roundabout
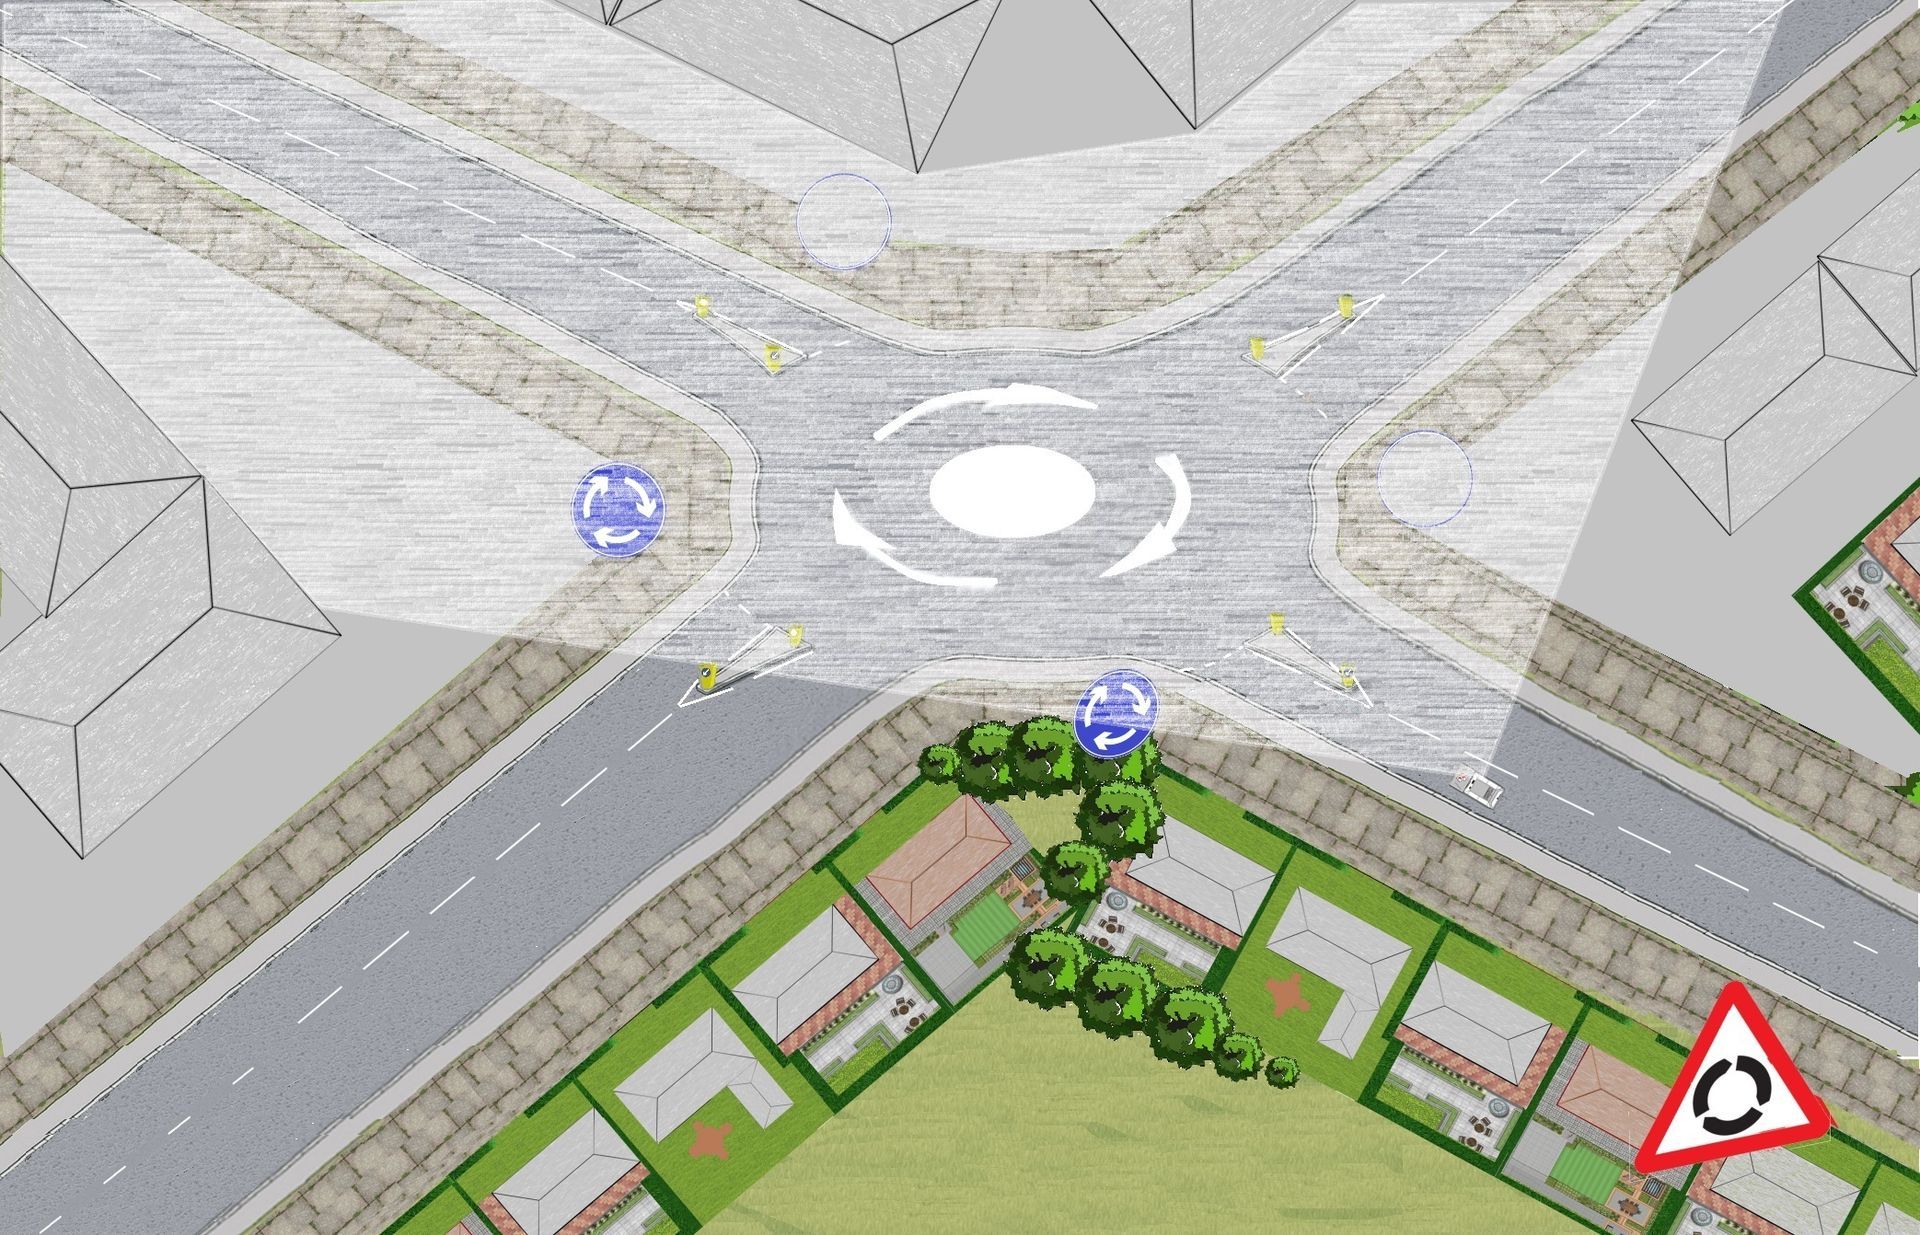
Closed view on the approach to a mini roundabout
Open V closed view
On the approach to all roundabouts an open view is by the time you are 4/5 white lines (or 4/5 car lengths) from the give way line you can see more than 4/5 white line (or 4/5 car lengths) on your immediate right. Think back to the single/multi lane roundabout brief there was a safety area (a red ring around from the outer edge of the islands.
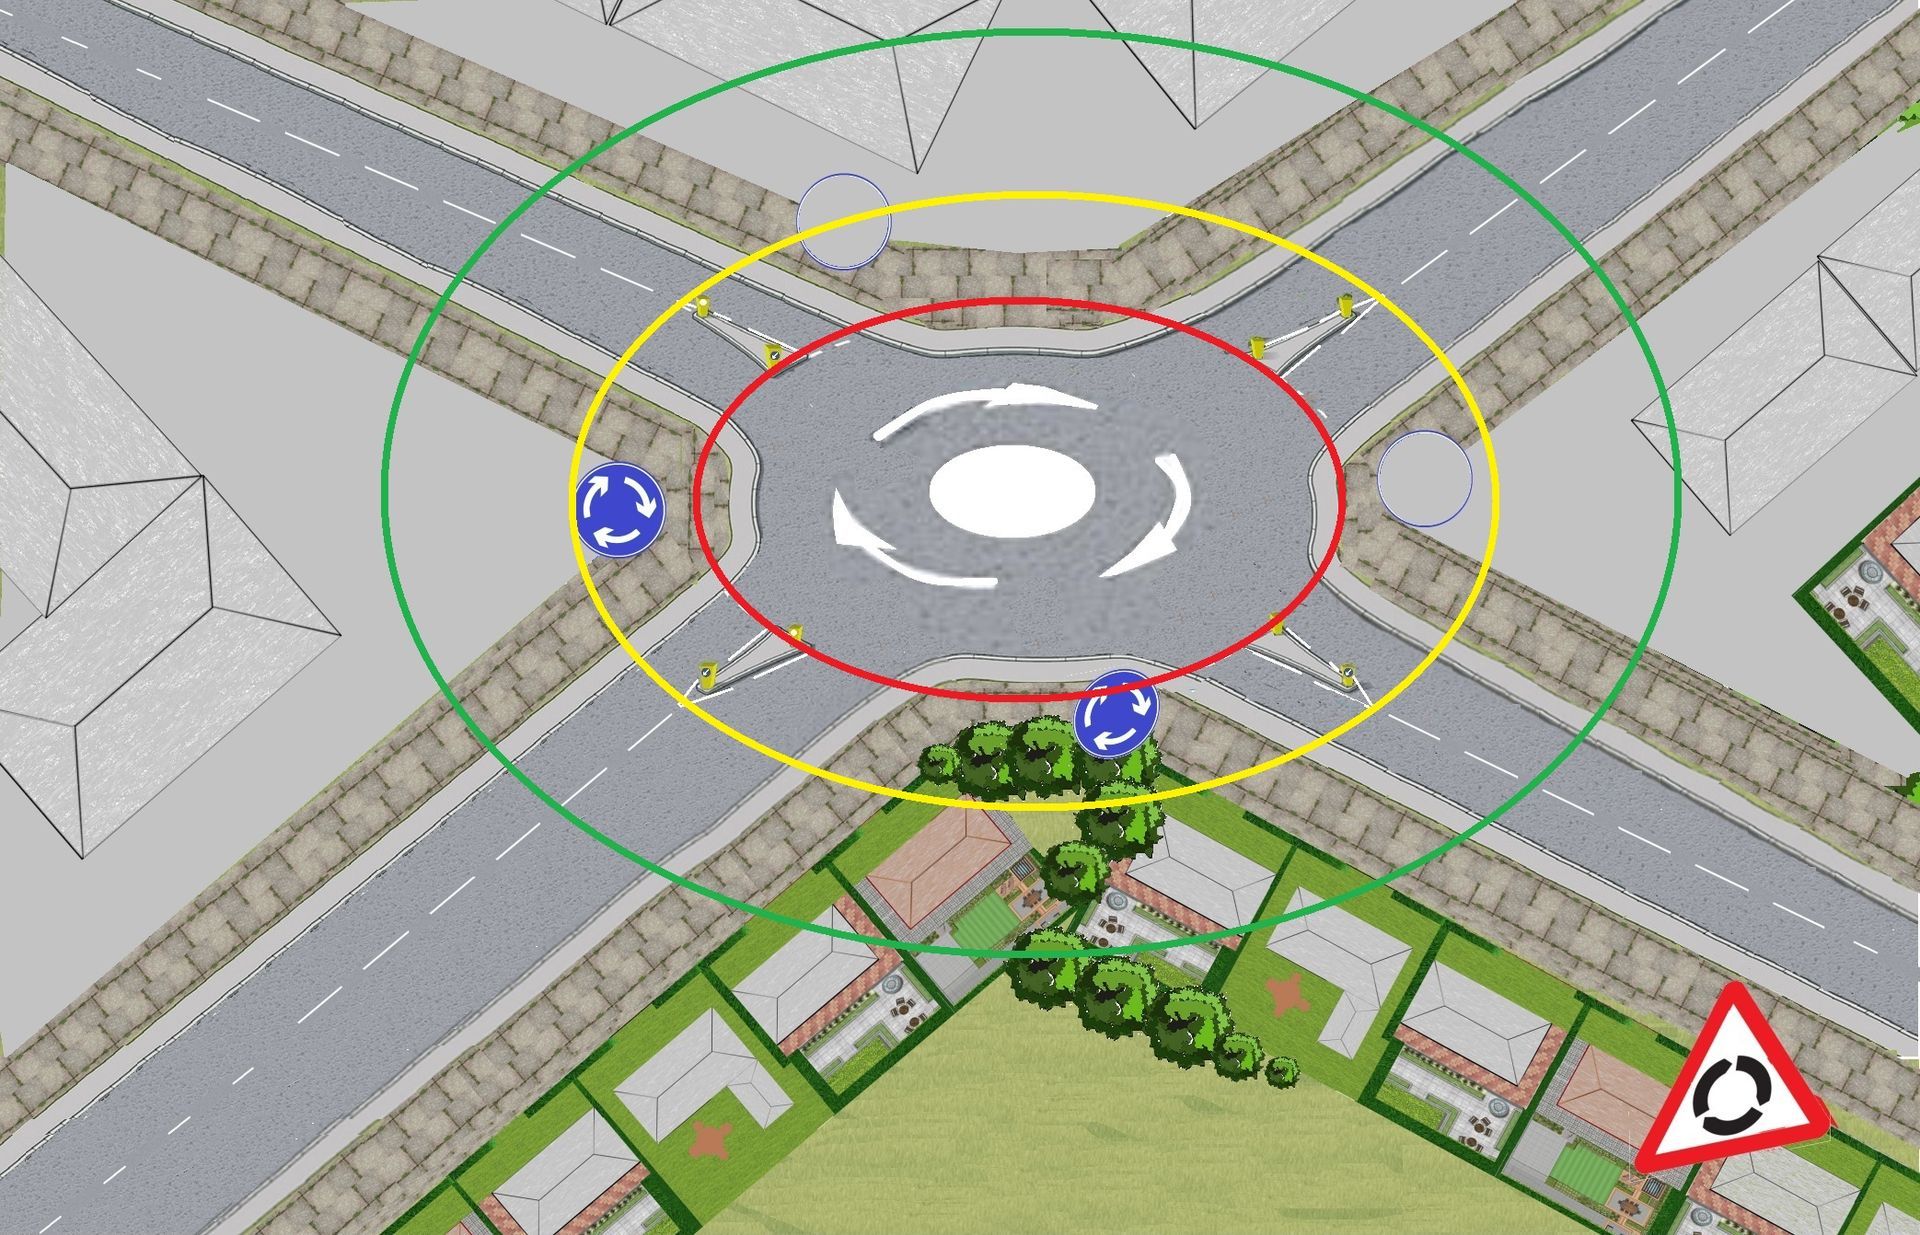
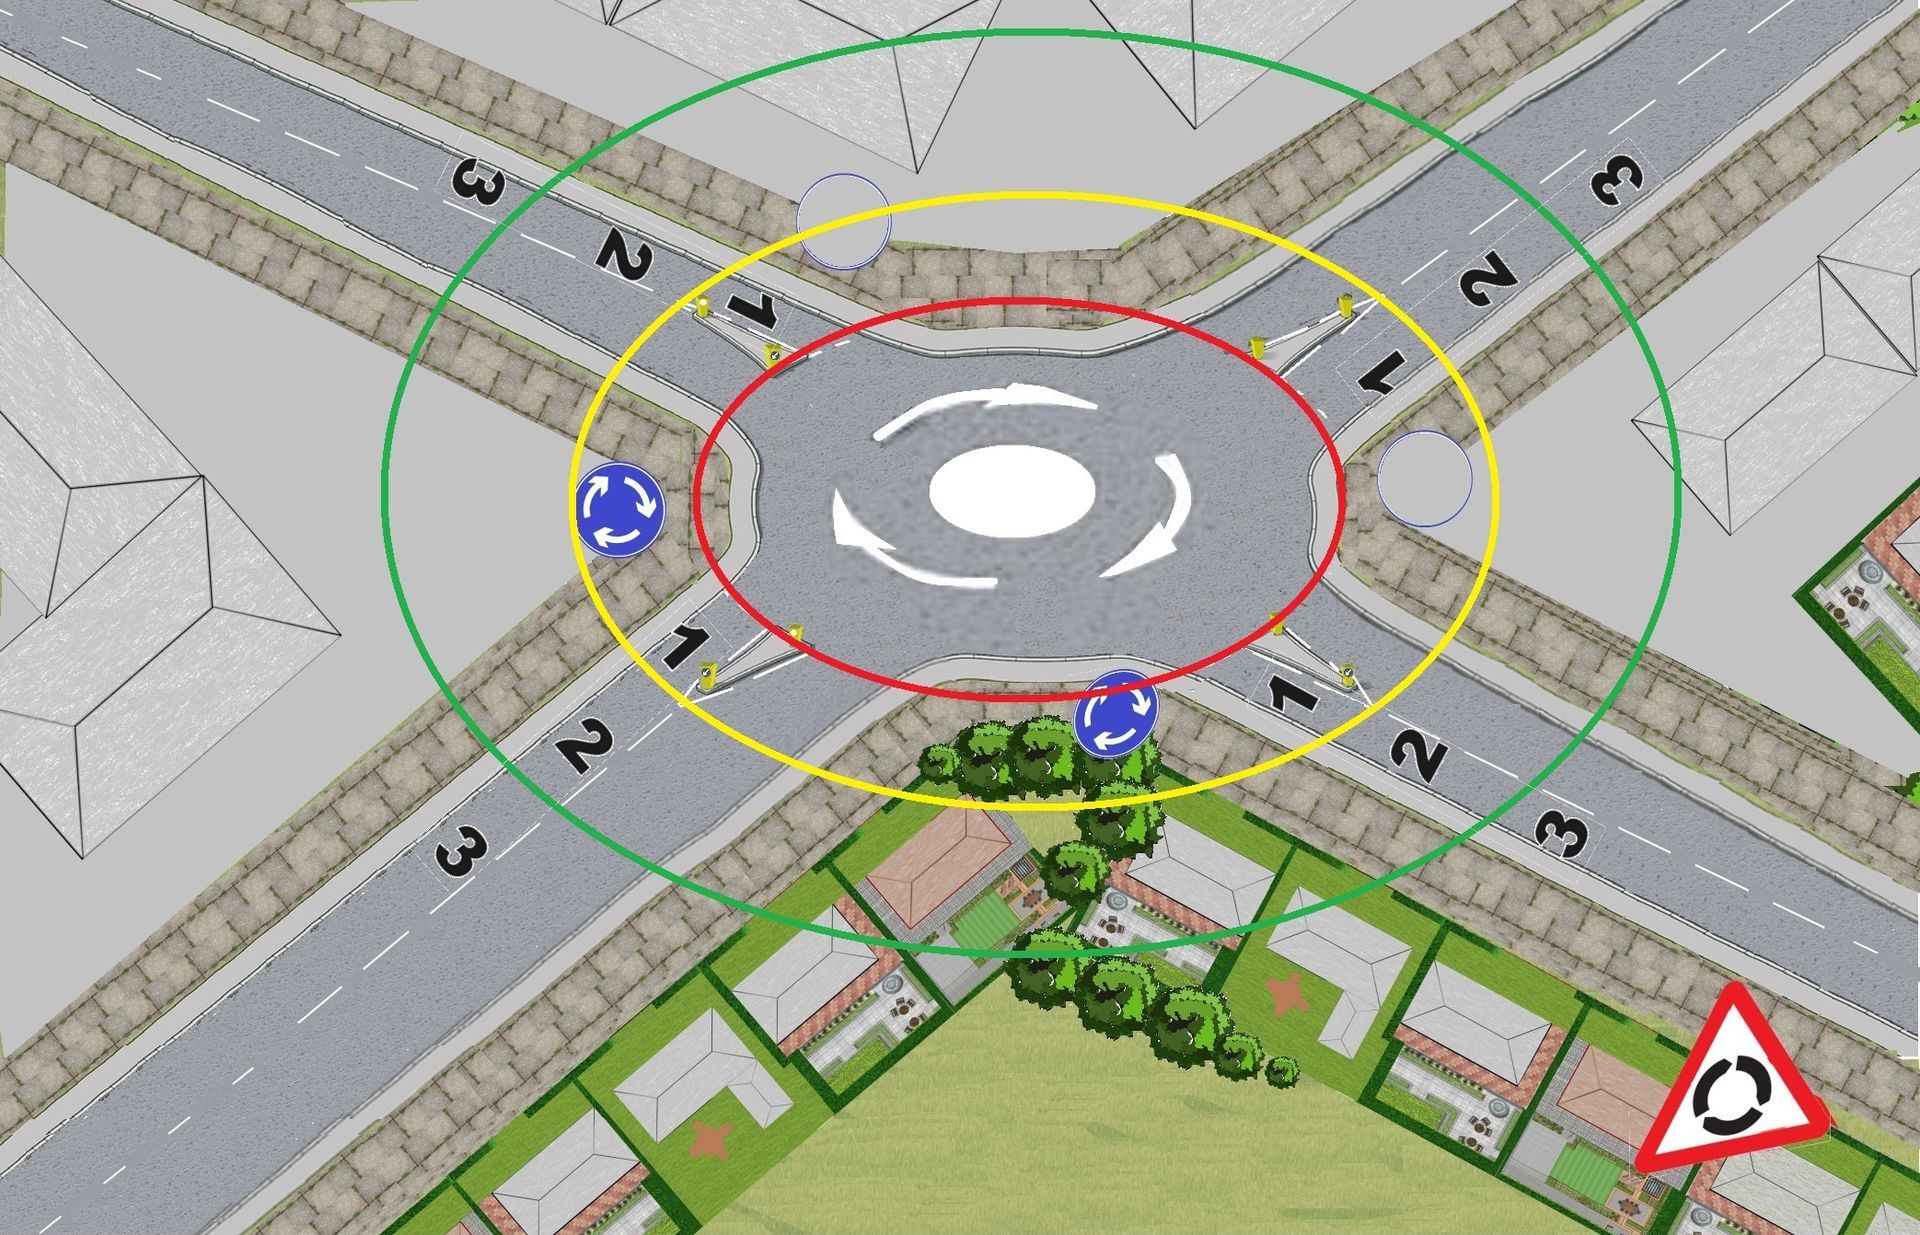
Zones
Imagine your roundabout is split into 3 zones, putting a red ring around the mouth of the roundabout.
Then two white lines back put an amber ring around the roundabout.
Two lines back from that put another ring Green this time.
Then between the lines put zones (1, 2 & 3)


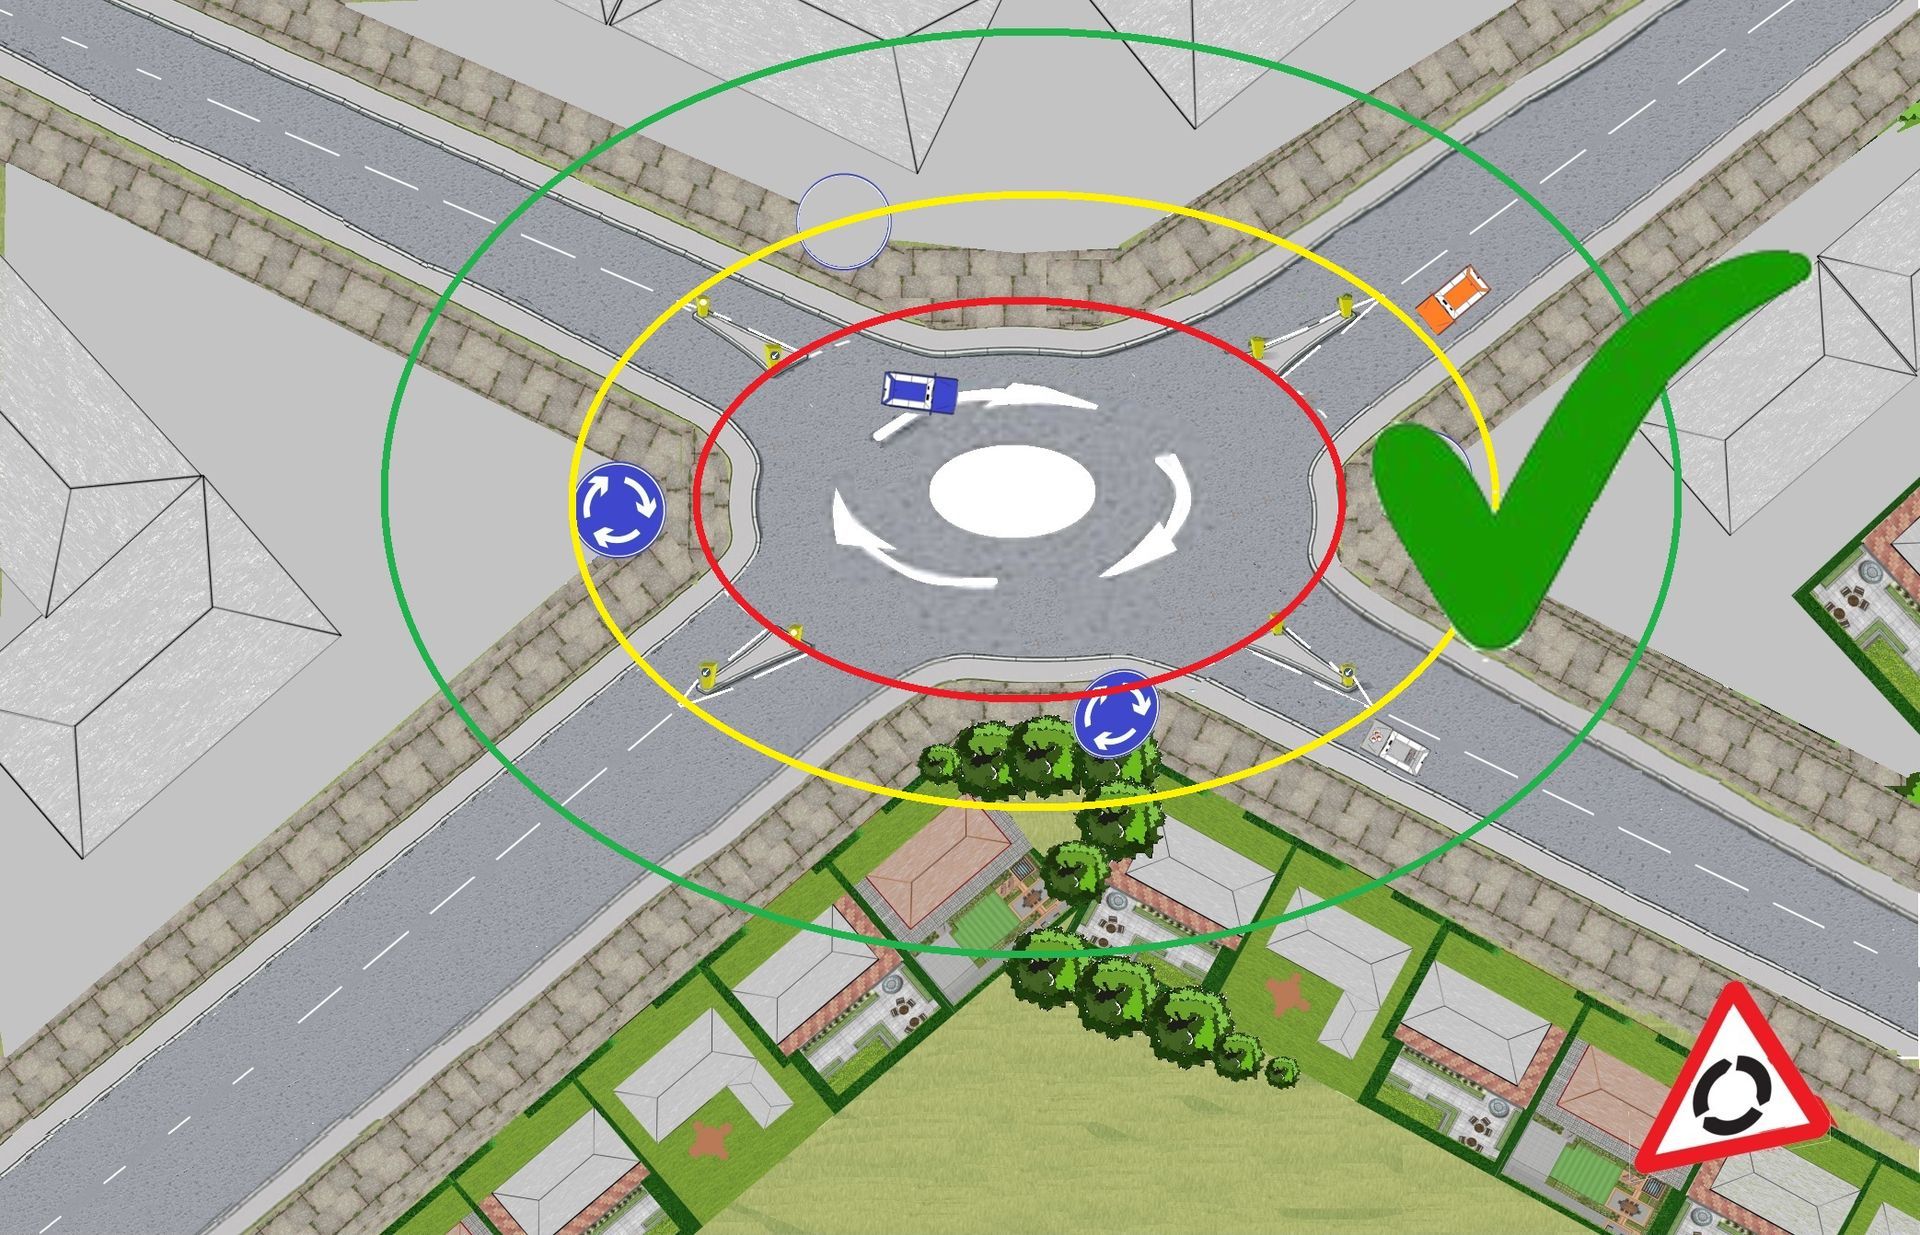
Safe to proceed

Unsafe to proceed

Safe to proceed diagram
As you can see in the above diagram the learner vehicle is between red and amber (zone 1) roughly 1 to 2 white hazard warning lines from the roundabouts give-way line. The amber vehicle on the immediate right is between amber and green (zone 2) roughly 3 to 4 lines from the roundabout give-way line, so it is safe for the learner vehicle to make progress.
Unsafe to go diagram
As you can see in the other above diagram the learner vehicle is at the same place as the amber vehicle between amber and green (zone 2). Due to both vehicle being in the same zone (2), you (the learner)will have to give way to your imamate right.
Give -way to ahead
Remember your immediate right has to give way to their immediate right (out 12 0' clock). Ensure you are looking ahead and a to the left as if these vehicles are already on the roundabout they could become your mechanical shield (safety bubble).
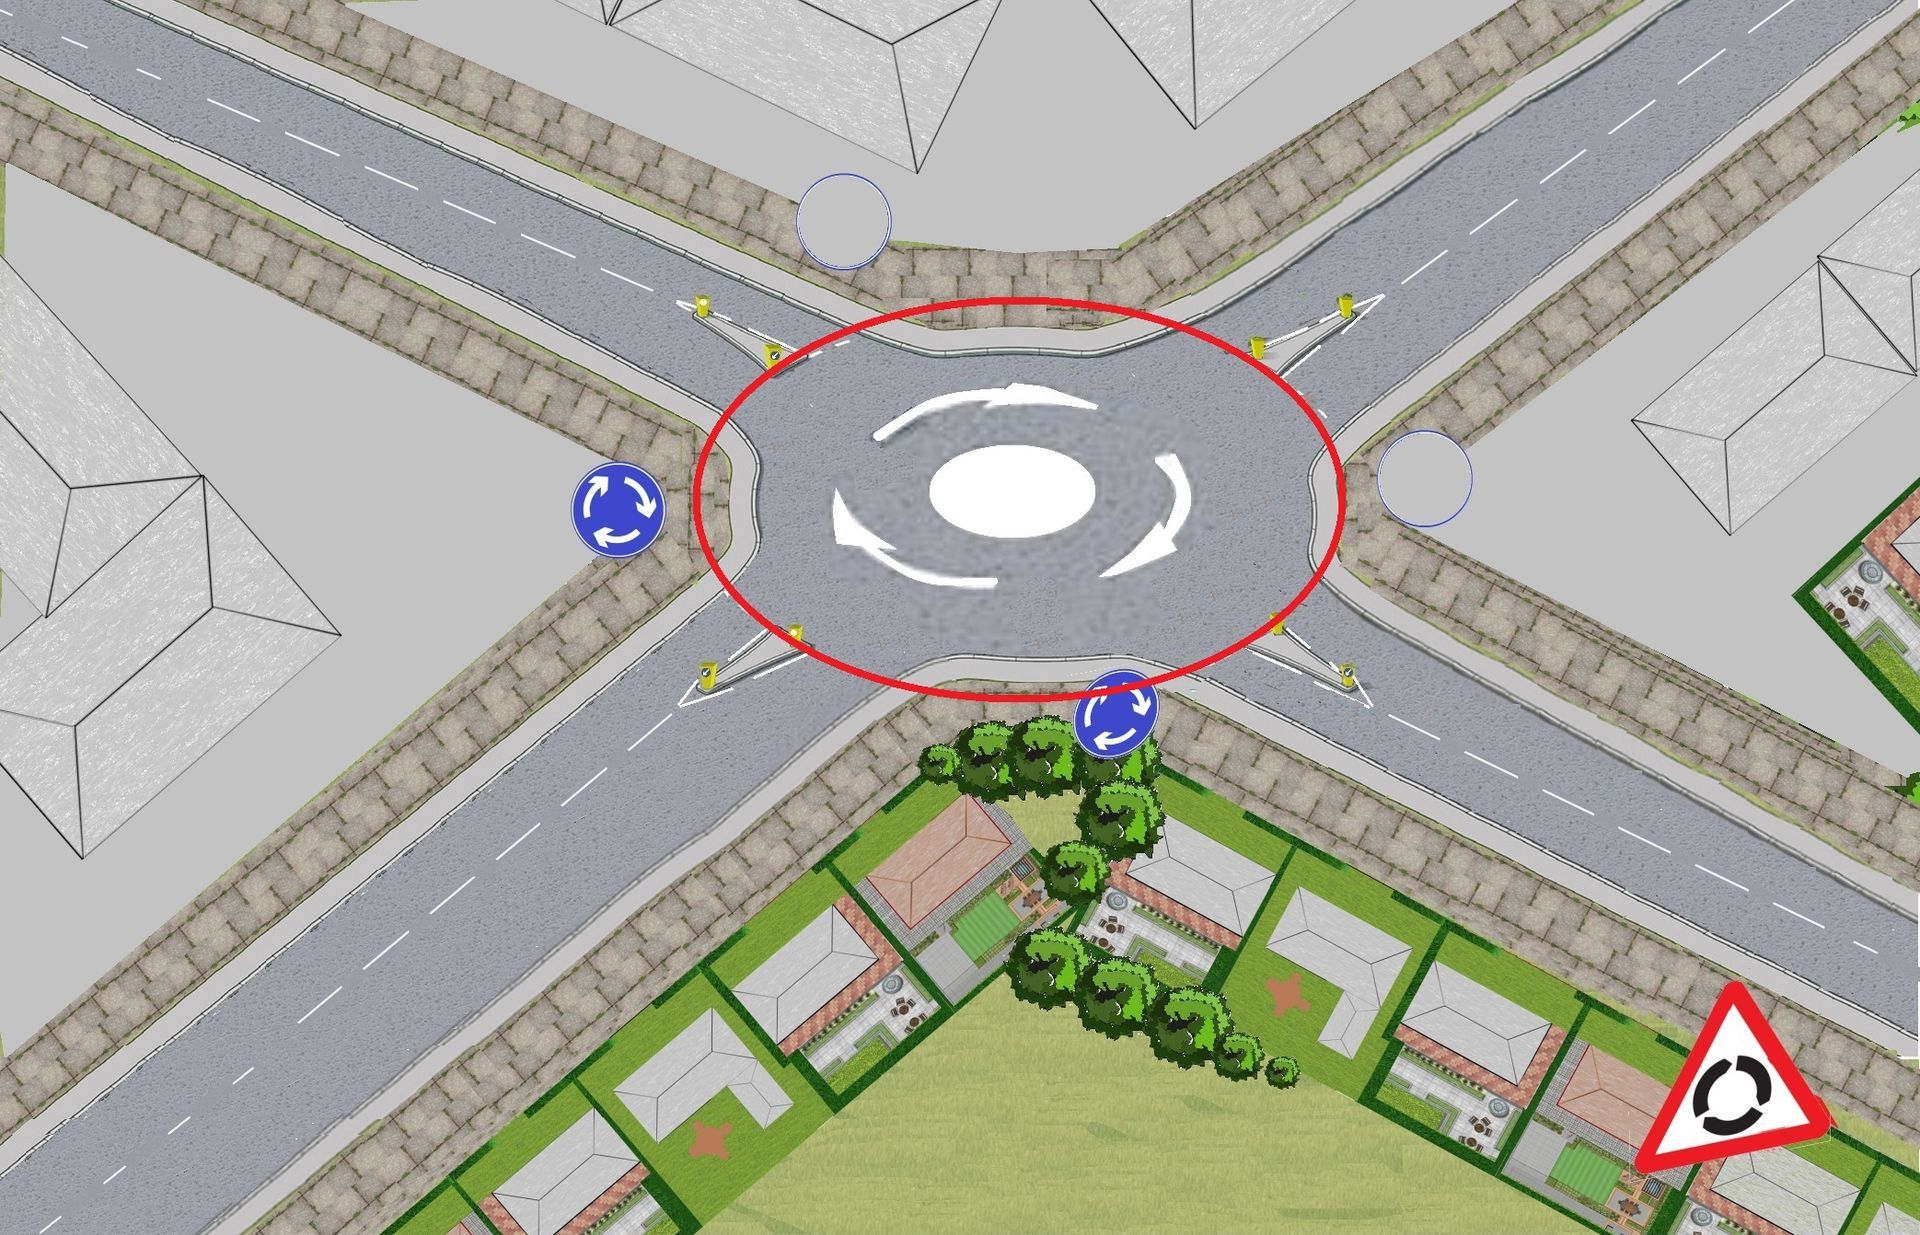
Mini roundabout signs
On the approach to most mini roundabouts you will get two warning information signs (a red triangle). Then at the mouth of the mini roundabout will be a blue circle sign with three white arrow making a circle shape.
The red triangle is about 8/10 car lengths from the mini roundabout and the blue one is at the mini roundabout junction.

Understanding a mini roundabout
Think of all roundabout as a clock face, so you’re approaching from the bottom of the clock at 6 o’clock, ahead is 12 o’clock, left is 9 o’clock and right is 3 o’clock (just like a single and multi lane roundabout).
Approaching a mini roundabout
- Apply early observations as early as possible (L.A.D.A).
- Check your interior mirror on a general drive every 4/10 seconds (depending on the situation)
- On a 30MPH road and no other vehicle in front of you I would instruct a student to de-press the gas pedal 3/4 lamp posts before the red triangle sign.
- Then start your hazard routine as you roughly at the red triangle round sign (10/12 car lengths from the roundabout).
Open or closed
Roundabouts can be open or closed (L.A.D.A early so you can assess the flow of traffic on the roundabout as your approach). The purpose of early planning is to give you the time to adjust your speed (usually 2nd gear) and then if possible you can safely merge into a gap on your right without stopping.
Timing of your hazard routine
Correct use of signals
When approaching a mini roundabout the use of the signal (indicator) to leave is not necessary.
The reason being the mini roundabouts are to small and you could easily lose control of your steering when your leaving.
- When going left signal left.
- When going right signal right (only).
- When going straight ahead no signals at all.
While your approaching you may be faced with vehicle from your right you need to give way to or stop for them (vehicle on the right has priority).
So let’s break down L.A.D.A and the HAZARD routine when approach a mini roundabout so you gain information with:-
- Open or closed junction
- what's approaching from ahead, right and left
- What's directly in front of you.
Turning left (1st exit)
Start the hazard routine 12/10 car lengths away from the roundabout.
● Mirrors interior and left (door mirror)
● Signal left
● Position to the centre of your lane so you don’t clip the Kerb as you turn.
● Speed down (OPEN JUNCTIONS ARE A WALKING PACE, CLOSED IS A CRAWLING PACE).
● Gear on the approach (2nd if clear and open or 1st if closed and you have to stop)
Use L.A.D.A on the approach to see if it’s an open or a closed junction, anticipate parked cars or pedestrians. (Use the technique of putting your wing mirror on the white centre line or centre island).
Straight ahead (2nd exit)
When entering a roundabout if you are going straight ahead start the hazard routine 12/10 car lengths away from the roundabout.
● Mirrors (check all 3)
● Signal (no need to signal)
● Position to the centre of your lane so you don’t clip the Kerb as you turn, L.A.D.A for early observations
● Speed (OPEN JUNCTION IS A WALKING PACE, CLOSED IS A CRAWLING PACE).
● Gear on the approach (2nd if clear and open or 1st if closed and you have to stop)
Use L.A.D.A on the approach to see if it’s an open or a closed junction, anticipate parked cars and pedestrians (Use the technique of putting your wing mirror on the white line or on the edge of the centre island).
Once you are on the roundabout and once you get to 9 o’clock, check your Mirrors but there is no need to Signal left to leave
Turning right (3rd exit)
When turning right at a roundabout always start the hazard routine 12/10 car lengths away from the roundabout.
● Mirrors right
● Signal right
● Position to the centre white line so you don’t clip the curb as you turn, L.A.D.A for early observations (*please note you might need to be just closes enough to the centre island and not the white centre line).
● Speed (OPEN JUNCTION IS A WALKING PACE, CLOSED IS A CRAWLING PACE).
● Gear on the approach (2nd if clear and open or 1st if closed and you have to stop).
Use L.A.D.A on the approach to see if it’s an open or a closed junction, anticipate parked cars and pedestrians. (Use the technique of putting your wing mirror on the white line or on the centre island).
Once you are on the roundabout make progress and once you get to 12 o’clock, check your mirrors only as there is no need to signal (indicate) left to leave, as the mini roundabout is to small and you could lose control when leaving if you try to signal and steer.
Strategy
Anticipate and plan with the vehicles that are coming towards you, look for clues to see if the approaching vehicle (or even the bike) is going left, right or straight ahead. Always look for clues on where they are intending to go as they could be signalling and then cross in front of you.
Always look at the driver’s:-
- Indicator
- Shoulders (as the more they are moving the further they will be going around
- The direction of the front tyres
Look for clues to slow-plan-go.
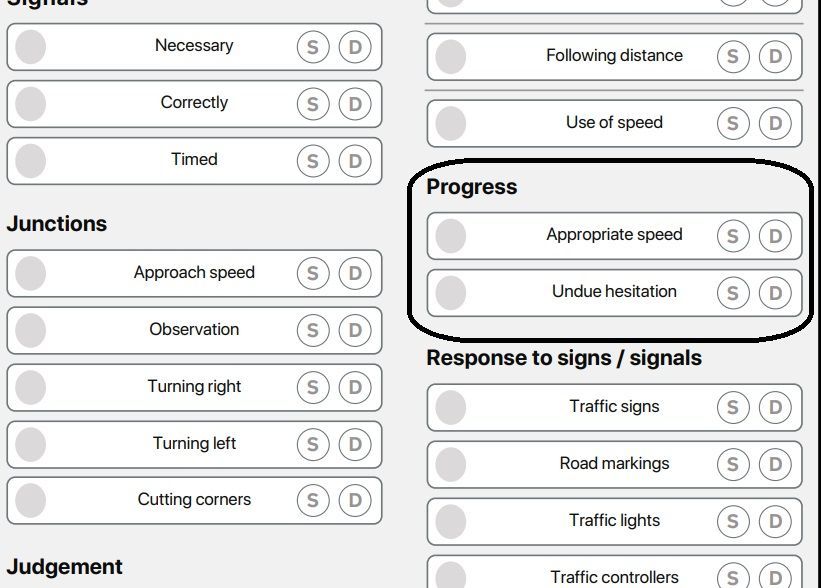
You were marked on:
- appropriate speed - your ability to drive at an appropriate speed for the road and traffic conditions
- undue hesitation - your ability to maintain progress, and not hesitate and slow down when you did not need to
You should have driven at a speed appropriate for the road and traffic conditions, without holding up other road users.
Your examiner will have monitored this throughout the test.
Examples of faults
Some of the most common faults for this area include:
- not emerging from a junction when it is safe to do so
- driving too slow unnecessarily, holding up following traffic
- driving well below the speed limit on clear roads
- waiting unnecessarily for another road user to pass who has clearly given way to you
Your examiner may have explained the specific details of any faults you made.
How you can improve in this area
If you made faults in this area during your test, or if you want to improve in this area, you should:
- check rule 146 of The Highway Code
- read pages 254 to 261 of ‘The Official DVSA Guide to Driving: the Essential Skills’ (2022 edition)
If you need to rebook the test, spend time practising this skill with your driving instructor or supervising driver. You could work on:
- keeping up with the flow of traffic and making confident decisions when emerging
- driving in different weather conditions
Highway code 190
At some complex junctions, there may be a series of mini-roundabouts at each intersection. Treat each mini-roundabout separately and follow the normal rules.
Teaching & Learning Strategies
Like mentioned earlier every student is induvial and each and everyone of you will progress at different rates so driving will adapt their lesson plan to help you achieve your driving goals.
- Your driving instructor will adapt their teaching style to suite your ability and ability
- Your driving instructor will continue to encourage you on your lesson and analyse any problems made and allow you to take responsibility for your own learning goals by giving you technical information to improve your techniques. Your technical feed back from your instructor will be ether given on the move or if feel needed by pulling you up on the side of the road somewhere safe, legal and convenient.
Rote learning (WikipediA)
Rote learning is a memorization technique based on repetition. The method rests on the premise that the recall of repeated material becomes faster the more one repeats it. Some of the alternatives to rote learning include meaningful learning, associative learning, spaced repetition and active learning.
At the end of your lesson
At the end of your lesson you will have a debrief with your instructor giving you the opportunity to reflect on your performance on your lesson then you can set up new goals for your next driving lesson.
This will also give you the opportunity to research any new topics that will be brought into on your next agreed lesson. So remember your instructor is there to HELP you, so on your driving lesson if you have any uncertainties or need anything rewording or recapping to make things any clearer, just ask.

All Rights Reserved | 1st Choice driving school Grimsby 2024
